抽个空写个入门级的教程----关于ListView,GridView,单选多选盖布的效果。本文全部以GridView做例子,当然把GridView搞得烂熟,ListView就没有太大压力了,好了,进入主题:
先看选项item布局:choose_item.xml
<com.cheny.demo.QuadrateFrameLayout xmlns:android="http://schemas.android.com/apk/res/android"
    android:layout_width="match_parent"
    android:layout_height="match_parent" >

    <RelativeLayout
        android:layout_width="match_parent"
        android:layout_height="match_parent" >

        <ImageView
            android:id="@+id/iv_icon"
            android:layout_width="35dp"
            android:layout_height="35dp"
            android:layout_centerInParent="true"
            android:background="@drawable/ic_launcher"
            android:scaleType="fitXY" />

        <TextView
            android:id="@+id/tv_type_name"
            android:layout_width="match_parent"
            android:layout_height="wrap_content"
            android:layout_below="@id/iv_icon"
            android:layout_marginBottom="5dp"
            android:layout_marginTop="6dp"
            android:gravity="center"
            android:text="Music"
            android:textColor="@color/white"
            android:textSize="11sp" />
    </RelativeLayout>

    <View
        android:id="@+id/v_shelter"
        android:layout_width="match_parent"
        android:layout_height="match_parent"
        android:background="@color/gv_item_selected"
        android:scaleType="fitXY" />

</com.cheny.demo.QuadrateFrameLayout>
这里的QuadrateFrameLayout类是为了让item界面程正放形显示,我重写了FrameLayout类并重写了onMeasure方法,代码如下:
    @Override
    protected void onMeasure(int widthMeasureSpec, int heightMeasureSpec) {

        setMeasuredDimension(getDefaultSize(0, widthMeasureSpec), getDefaultSize(0, heightMeasureSpec));
        // Children are just made to fill our space.
        int childWidthSize = getMeasuredWidth();
        int childHeightSize = getMeasuredHeight();
        // 设置布局高宽等比
        heightMeasureSpec = widthMeasureSpec = MeasureSpec.makeMeasureSpec(childWidthSize, MeasureSpec.EXACTLY);
        super.onMeasure(widthMeasureSpec, heightMeasureSpec - 20);
    }
选择兴趣布局activity_choose_interest.xml代码:
<?xml version="1.0" encoding="utf-8"?>
<RelativeLayout xmlns:android="http://schemas.android.com/apk/res/android"
    android:layout_width="match_parent"
    android:layout_height="match_parent"
    android:orientation="vertical" >

    <GridView
        android:id="@+id/gv_language"
        android:layout_width="match_parent"
        android:layout_height="match_parent"
        android:background="@color/gv_bg"
        android:choiceMode="multipleChoice"
        android:gravity="center"
        android:horizontalSpacing="2dp"
        android:numColumns="3"
        android:scrollbars="none"
        android:stretchMode="columnWidth"
        android:verticalSpacing="2dp" >
    </GridView>

</RelativeLayout>
GridView的单选多选在于这一行属性代码:android:choiceMode="multipleChoice" multipleChoice是多选,singleChoice是单选。
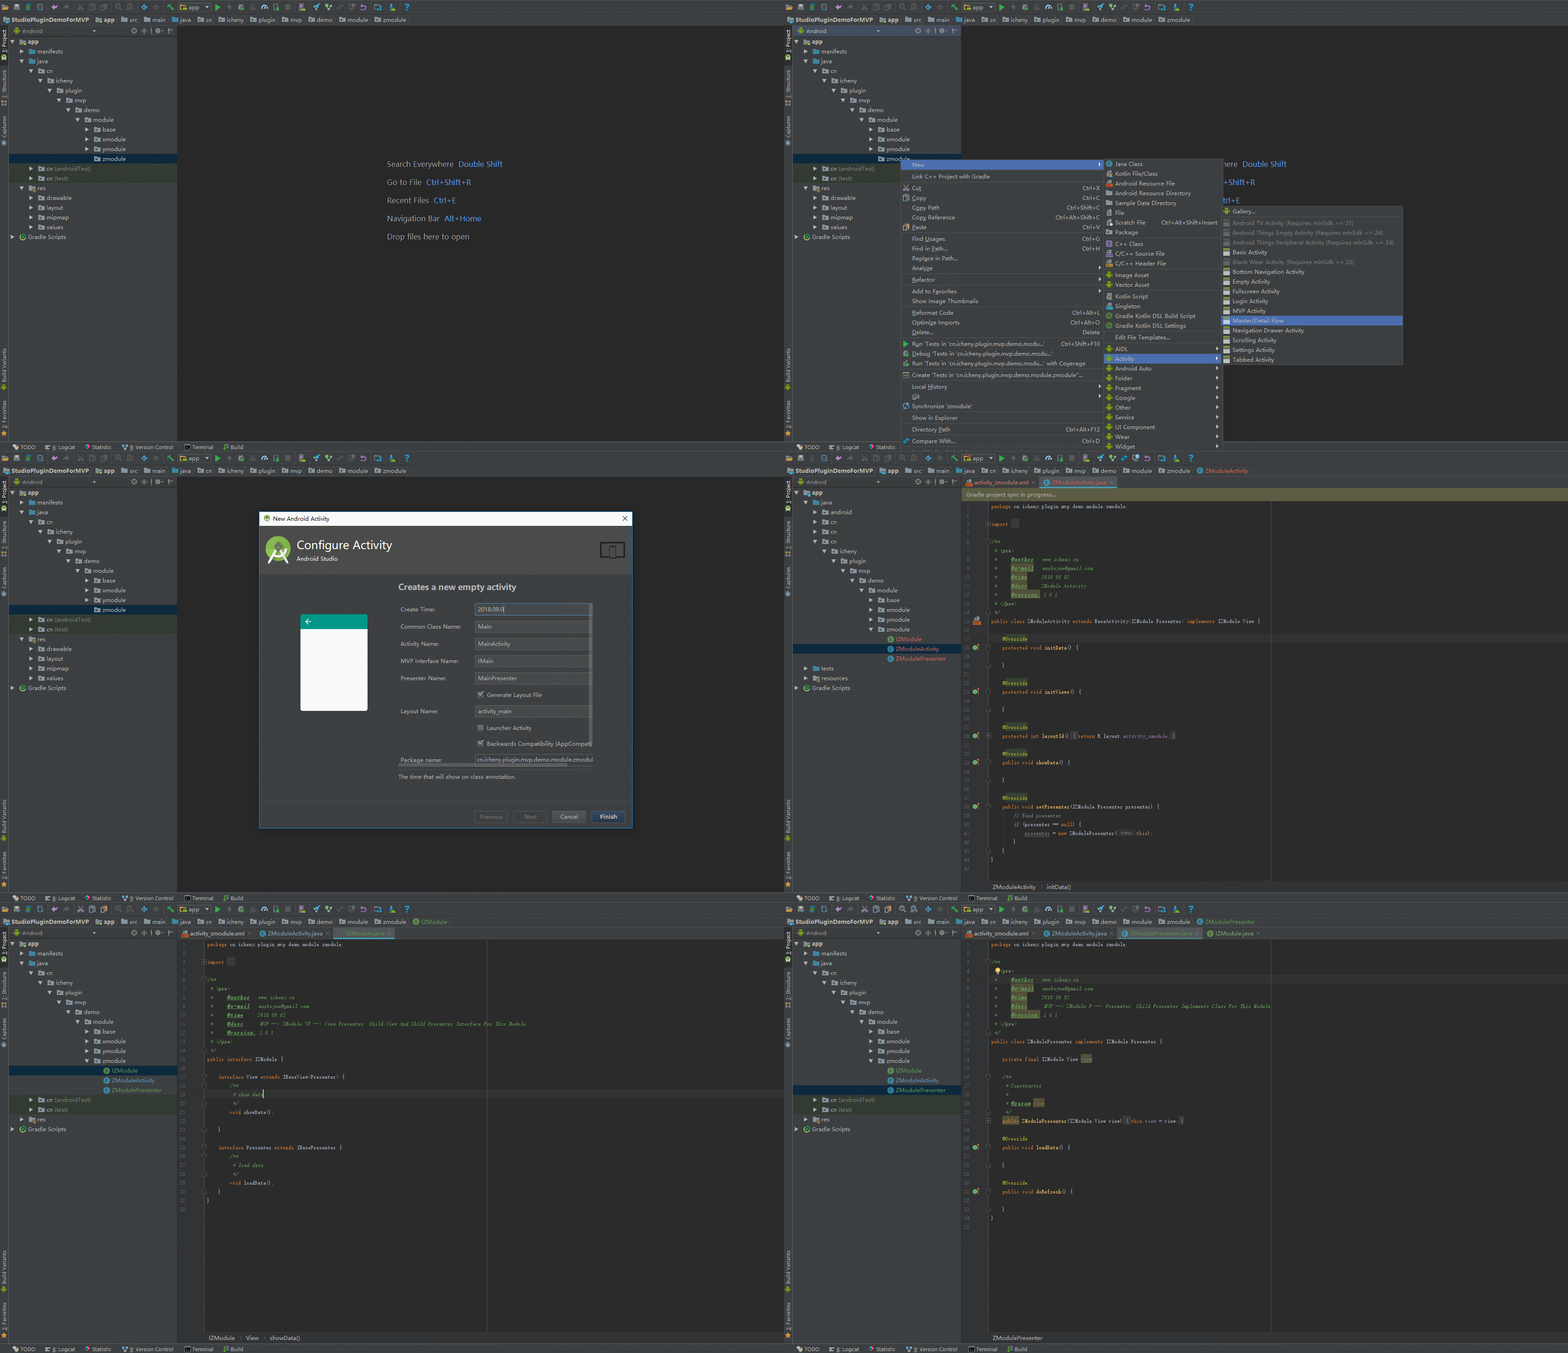
单选默认选中 ---->
![图片[1]-ListView,GridView,单选默认选中,单选和多选盖布效果 - 码蜂屋-码蜂屋](https://media.icheny.cn/image/201606031750037561.png)
思路:将需要在adapter中对默认选中的item设置Flag 。 核心代码:
class ChooseLanguageAdapter extends BaseAdapter {
        private static final int firstItem = 0;

        @Override
        public int getCount() {
            return null == languages ? 0 : languages.size();
        }

        @Override
        public Object getItem(int position) {
            return languages.get(position);
        }

        @Override
        public long getItemId(int position) {
            return position;
        }

        @SuppressLint("NewApi")
        @Override
        public View getView(int position, View convertView, ViewGroup parent) {

            String language = languages.get(position);
            ViewHolder viewHolder = null;
            if (null == convertView) {
                convertView = LayoutInflater.from(getApplicationContext()).inflate(R.layout.choose_language_item, null);
                viewHolder = new ViewHolder(convertView);
                convertView.setTag(viewHolder);
            } else {
                viewHolder = (ViewHolder) convertView.getTag();
            }

            viewHolder.tv_type_name.setText(language);
            // 我这里是默认选中第一个Item,给其设置checked 为true;
            if (firstItem == position && !firstItemHashShow) {
                gv_language.setItemChecked(position, true);
                showMessage(position);
                firstItemHashShow = true;
            }
            updateBackground(position, convertView);
            return convertView;
        }

        @SuppressLint("NewApi")
        public void updateBackground(int position, View view) {

            if (gv_language.isItemChecked(position)) {

                view.setBackground(getResources().getDrawable(R.drawable.gv_language_item_selected));
            } else {
                view.setBackgroundColor(getResources().getColor(R.color.gv_bg));
            }
        }

        class ViewHolder {
            TextView tv_type_name;

            public ViewHolder(View view) {

                tv_type_name = (TextView) view.findViewById(R.id.tv_type_name);
            }
        }
    }

    private void showMessage(int position) {
        Toast.makeText(ChooseLanguageActivity.this, "您当前选中的语言是: " + languages.get(position), Toast.LENGTH_SHORT).show();
    }
单选盖布效果 --->
![图片[2]-ListView,GridView,单选默认选中,单选和多选盖布效果 - 码蜂屋-码蜂屋](https://media.icheny.cn/image/201606031818400042.png)
思路: 利用Framlayout可以叠加层的特点,做一个占满布局的View,本教程中使用的是id为
v_shelter 的View布局,设置下背景颜色配置:gv_item_selected : <color name="gv_item_selected">#0F1F30</color>,在选中和未选中用代码动态更新 v_shelter的透明度,代码如下:
    /**
     * 选中时更新相应Item盖布
     *
     * @param position
     * @param viewHolder
     */
    public void updateBackground(int position, ViewHolder viewHolder) {
        if (gridView.isItemChecked(position)) {
            viewHolder.v_shelter.setAlpha(0);
        } else {
            viewHolder.v_shelter.setAlpha(0.5f);
        }
    }
多选盖布效果 --->
![图片[3]-ListView,GridView,单选默认选中,单选和多选盖布效果 - 码蜂屋-码蜂屋](https://media.icheny.cn/image/201606031821213133.png)
思路: 原理和单选差不多,这里需要做一个集合List<ChoiceItem> entities 把所有的选项放在集合里,监听选项选中事件,然后遍历出被选中的选项,代码如下:
        /* Item选中时更新GridView画面 */
        gv_interest.setOnItemClickListener(new OnItemClickListener() {
            public void onItemClick(AdapterView<?> parent, View view, int position, long id) {
                adapter.notifyDataSetChanged();
                showMessage();
            }
        });
    private void showMessage() {

        String str = "";
        for (int i = 0; i < entities.size(); i++) {
            if (gv_interest.isItemChecked(i)) {
                str += entities.get(i).getTypeName() + " ";
            }
        }
        Toast.makeText(ChooseInterestActivity.this, "您当前选中的兴趣是:" + str, Toast.LENGTH_SHORT).show();
    }
很显然,小伙伴们,如果想拿到这些被选中的选项,只要在遍历的时候判断gv_interest.isItemChecked(i)返回值为true就将当前选项加入新的集合里就可以了。
好了,教程结束,敲了好多字,好累,所以教程有很多暇眦,我会抽空优化的。如果小伙伴有什么疑问或需要源码的的可以评论你的问题,我会抽空回复的。






暂无评论内容